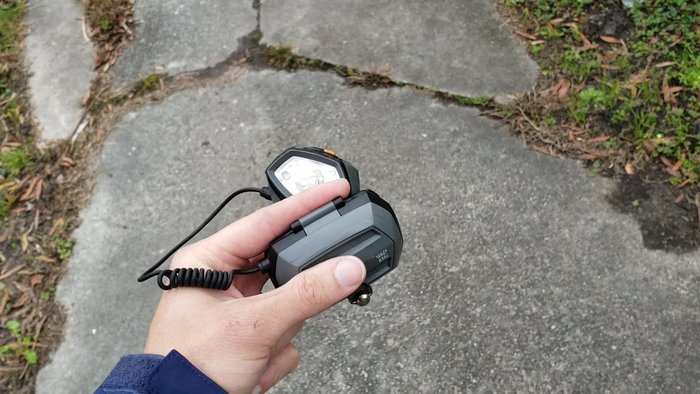
Cycling at night can be exhilarating, but safety is paramount. A bright, reliable bike light is essential for visibility and preventing accidents, but factory-fitted lights often fall short, offering limited battery life and underwhelming brightness. Upgrading your cycling illumination doesn't require a fortune; in fact, a simple battery pack modification can significantly enhance your night rides, extending runtimes and boosting lumens without breaking the bank. This modification is surprisingly straightforward, even for those with limited DIY experience.
This article will guide you through a cheap and easy upgrade to your bike light's battery system, transforming its performance with minimal effort and cost. We'll provide a step-by-step process, complete with clear instructions and helpful images, so you can confidently improve the safety and enjoyment of your evening rides. Ready to illuminate your night? Let's get started!
Preparation and Safety Guidelines
- Bike light (using AA/AAA batteries)
- Soldering gun
- Solder
- Battery pack (external)
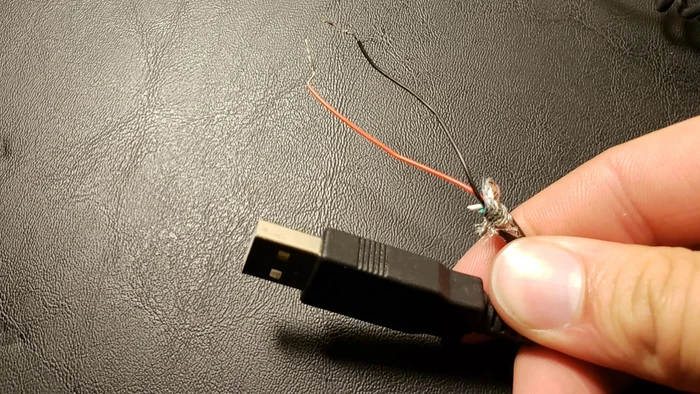
- MicroUSB to USB cable
- Use only batteries and connectors with voltage and amperage ratings appropriate for your bike light. Incorrect ratings can cause overheating, fire, or damage to the light.
- Ensure all connections are secure and properly insulated to prevent short circuits. Loose wires are a fire hazard.
- Never leave a charging battery unattended. Use a fire-resistant surface when charging and follow the manufacturer's charging instructions carefully.
Step-by-Step Instructions
Prepare the Bike Light
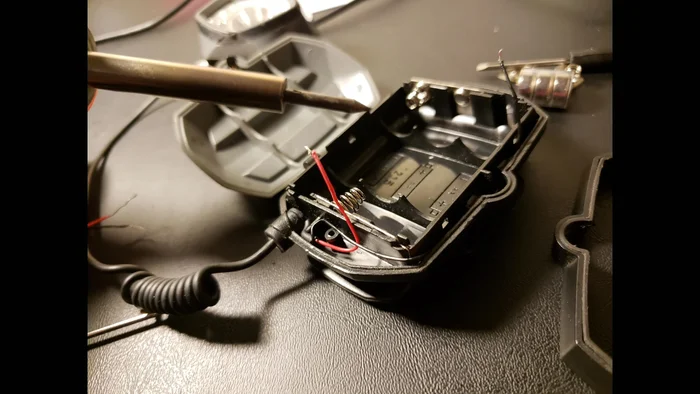
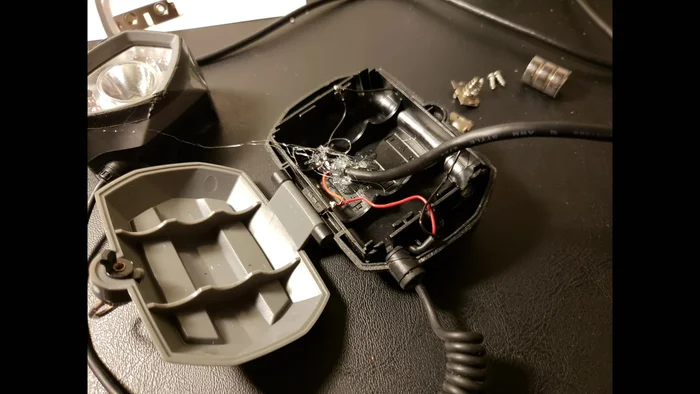
- Identify and prepare the bike light and battery pack.
- Cut off the existing metal contacts on the bike light connected to the positive and negative wires.
- Strip the wiring of both the bike light and the microUSB cable.

Prepare the Bike Light Prepare the MicroUSB Cable
- Keep only the red (positive) and black (negative) wires from the microUSB cable. Cut off the green and white wires.
Prepare the MicroUSB Cable Solder the Connections
- Solder the red wire from the microUSB cable to the red wire of the bike light and the black to black.
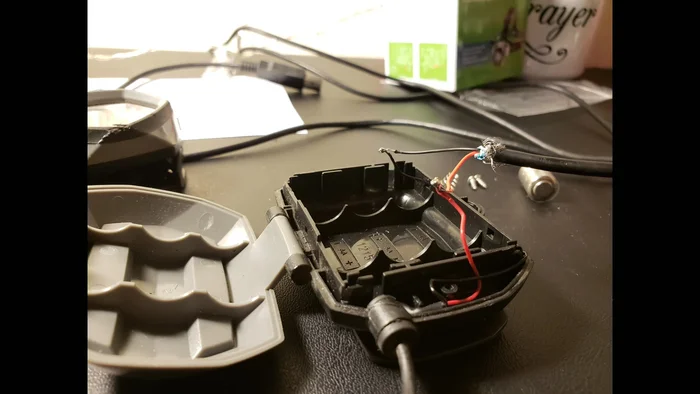
Solder the Connections Secure and Reinforce
- Secure the soldered connections. Use hot glue to reinforce the wires and prevent them from moving around.
Secure and Reinforce Test the Modification
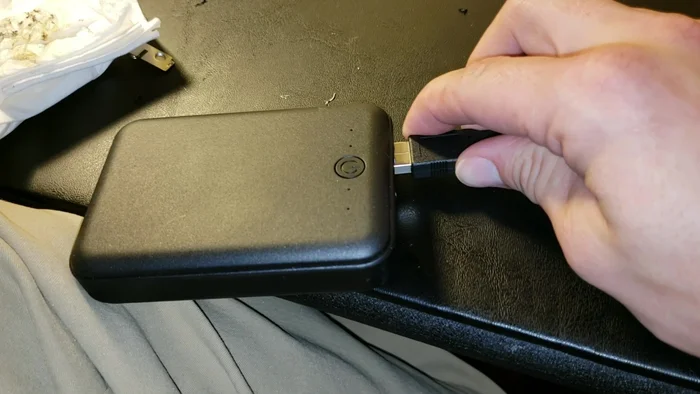
- Test the modified light by connecting it to the power supply and turning it on.
Test the Modification Assemble and Mount
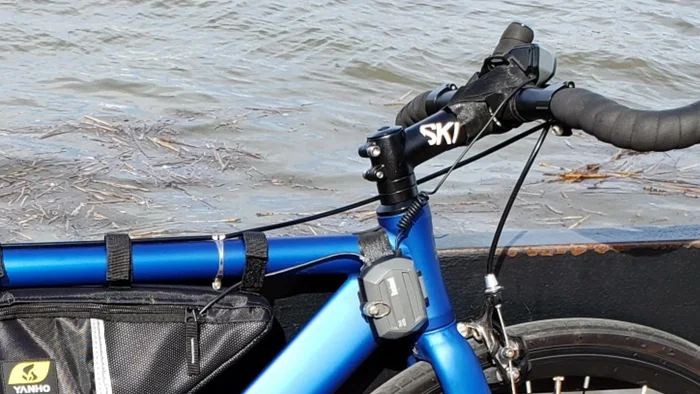
- Assemble the light and battery pack, securing them to your bike frame. Place the battery pack in a suitable bike bag.
Assemble and Mount

Read more: DIY Headlight Restoration: Restore Your Bike's Headlight to Like-New Condition!
Tips
- Use hot glue to secure wires and ensure the light case closes properly.