Tired of wrestling with complicated handlebar installations that leave you frustrated and sweating? Do you dream of a smooth, effortless upgrade that transforms your motorcycle's look and feel in a fraction of the time? Then prepare yourself for the revelation of a simpler, faster way to achieve your handlebar ambitions! Forget hours spent battling stubborn bolts and confusing diagrams – this isn't your grandpappy's motorcycle modification. We're about to unveil the secrets to a quick and easy miracle mirror motorcycle handlebar installation, perfect for even the most novice mechanic.
This guide will walk you through a streamlined process, stripping away the unnecessary complexity and revealing the core elements of a successful handlebar swap. We'll focus on efficiency and clarity, using straightforward language and helpful visuals to ensure you achieve a professional-looking result in record time. Ready to ditch the hassle and embrace a breathtakingly simple installation? Let's dive into the step-by-step instructions below.
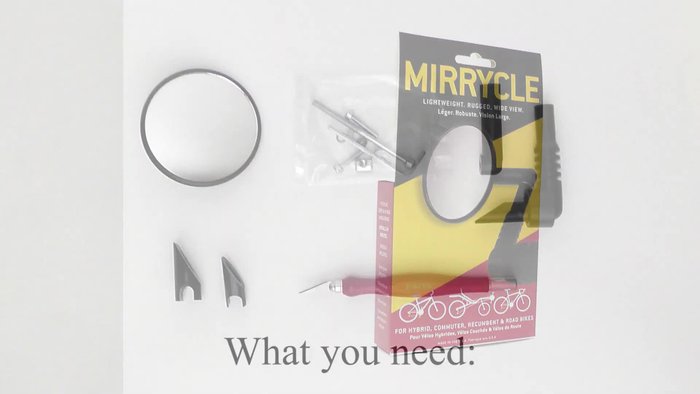
Preparation and Safety Guidelines
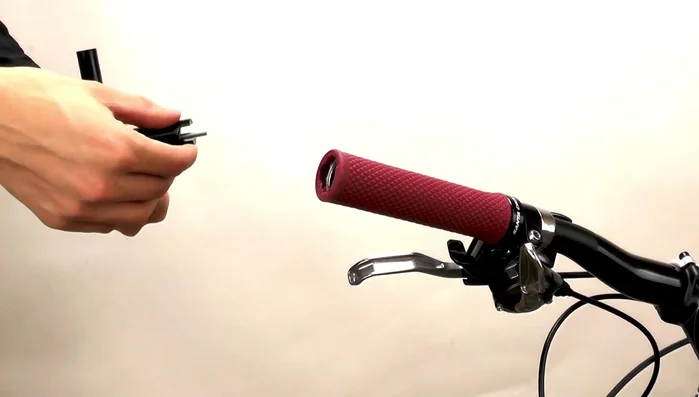
- Miracle Mirror
- Sharp Knife
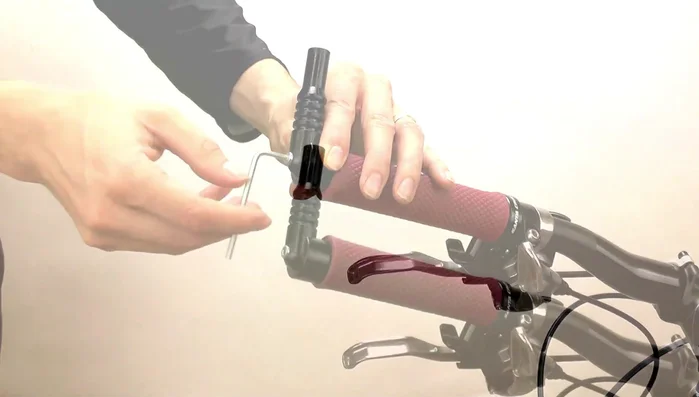
- Hex Wrench
- Always disconnect the battery's negative terminal before starting any electrical work on your motorcycle to prevent shorts and accidental injury.
- Ensure the handlebar clamps are properly tightened to the specified torque. Loose handlebars can cause loss of control and accidents.
- Double-check all wiring connections after installation to ensure everything is secure and functioning correctly. Loose or incorrect wiring can lead to electrical malfunctions.
Step-by-Step Instructions
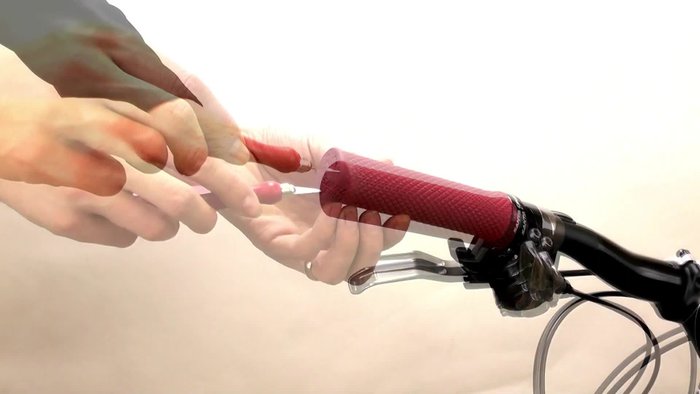
Prepare the Handlebar
- Cut the end of the left handlebar grip.
- Use a sharp knife to poke through and cut around the inside of the handlebar grip.

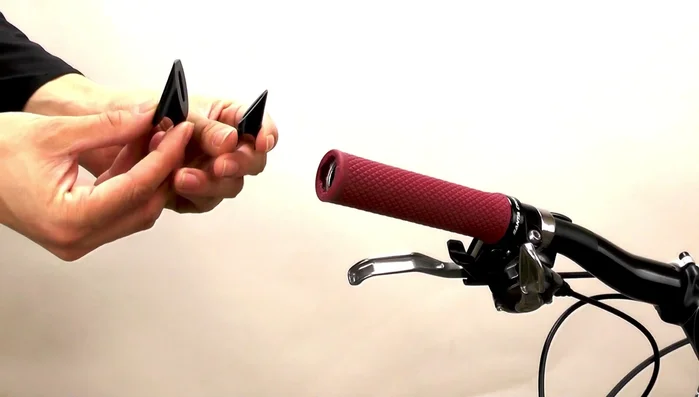
Prepare the Handlebar Assemble the Mirror Base
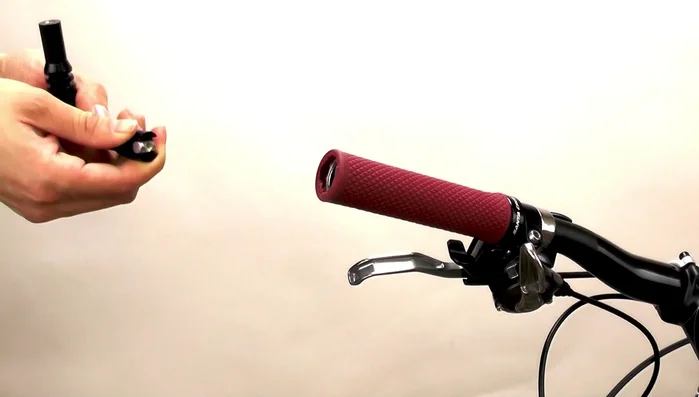
- Select the larger wedge provided with the mirror (unless it doesn't fit).
- Assemble the wedge to the mirror base using the long bolt and barrel nut.
- Insert the long bolt through the mirror base and wedge, then screw it into the barrel nut. Pull the wedge onto the barrel nut to secure.
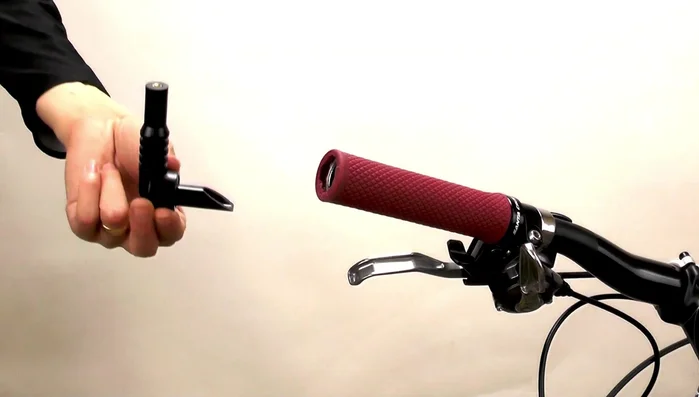
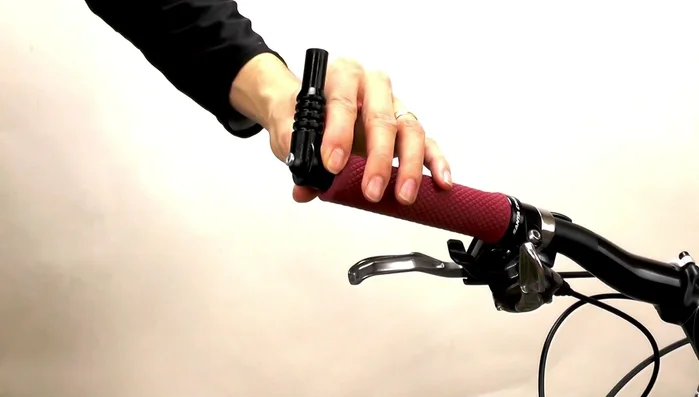
Assemble the Mirror Base Attach the Mirror Base to Handlebar
- Place the mirror base into the end of your handlebar, pushing it until it's snug against the grip.
- Use the included hex wrench to tighten the bolt until the mirror base is secured.
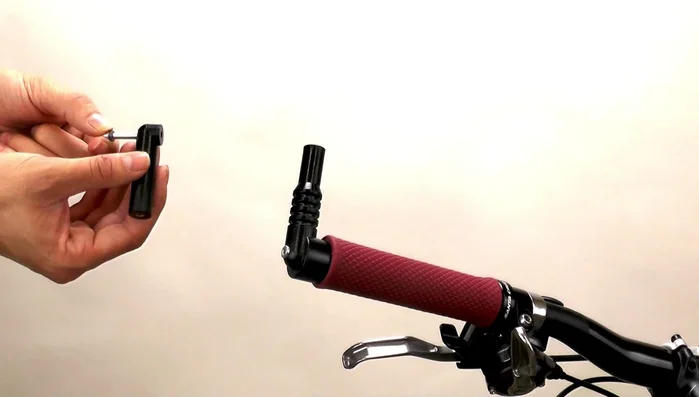
Attach the Mirror Base to Handlebar Attach Mirror Arm to Base
- Put three small washers on the cap screw and insert it into the hole in the elbow end of the mirror arm.
- Add a large washer to the cap screw and screw it into the mirror base, tightening with the hex wrench.
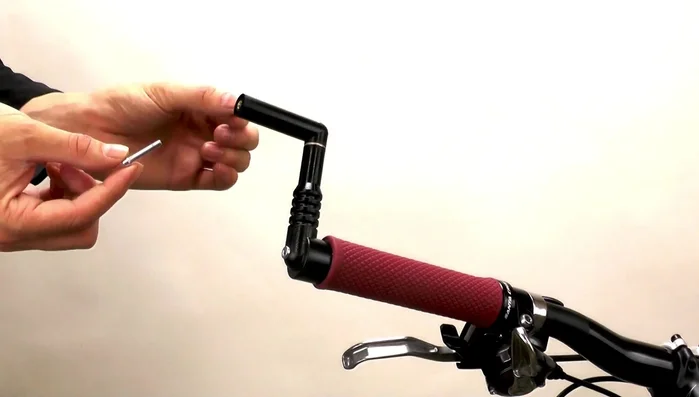
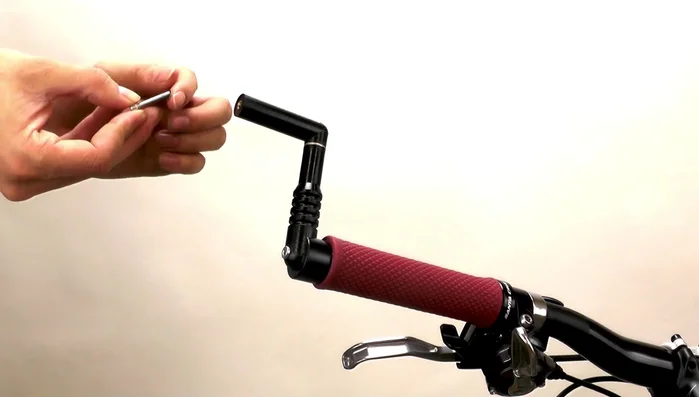
Attach Mirror Arm to Base Attach Mirror to Arm
- Add one small washer to a cap screw and insert it into the countersunk hole in the mirror holder bracket.
- Add a large washer to this cap screw, screw it into the mirror arm, and tighten with the hex wrench.
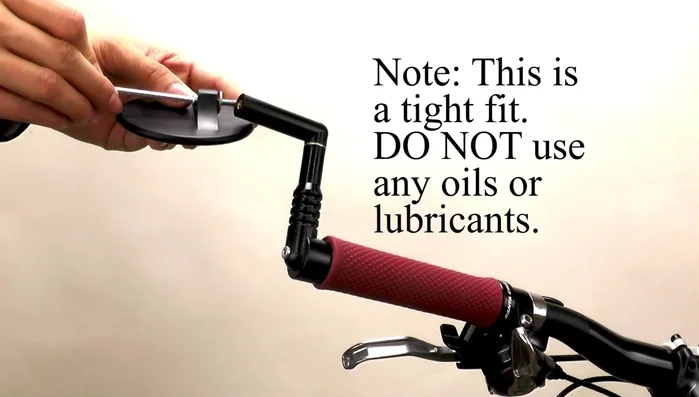
Attach Mirror to Arm Final Adjustment
- Ensure the mirror base points forward at a 45-degree angle to the ground.
Final Adjustment
Read more: DIY Motorcycle Mirror Repair: Quick & Easy Guide
Tips
- Use a fairly sharp knife for clean cuts when modifying the handlebar grip.